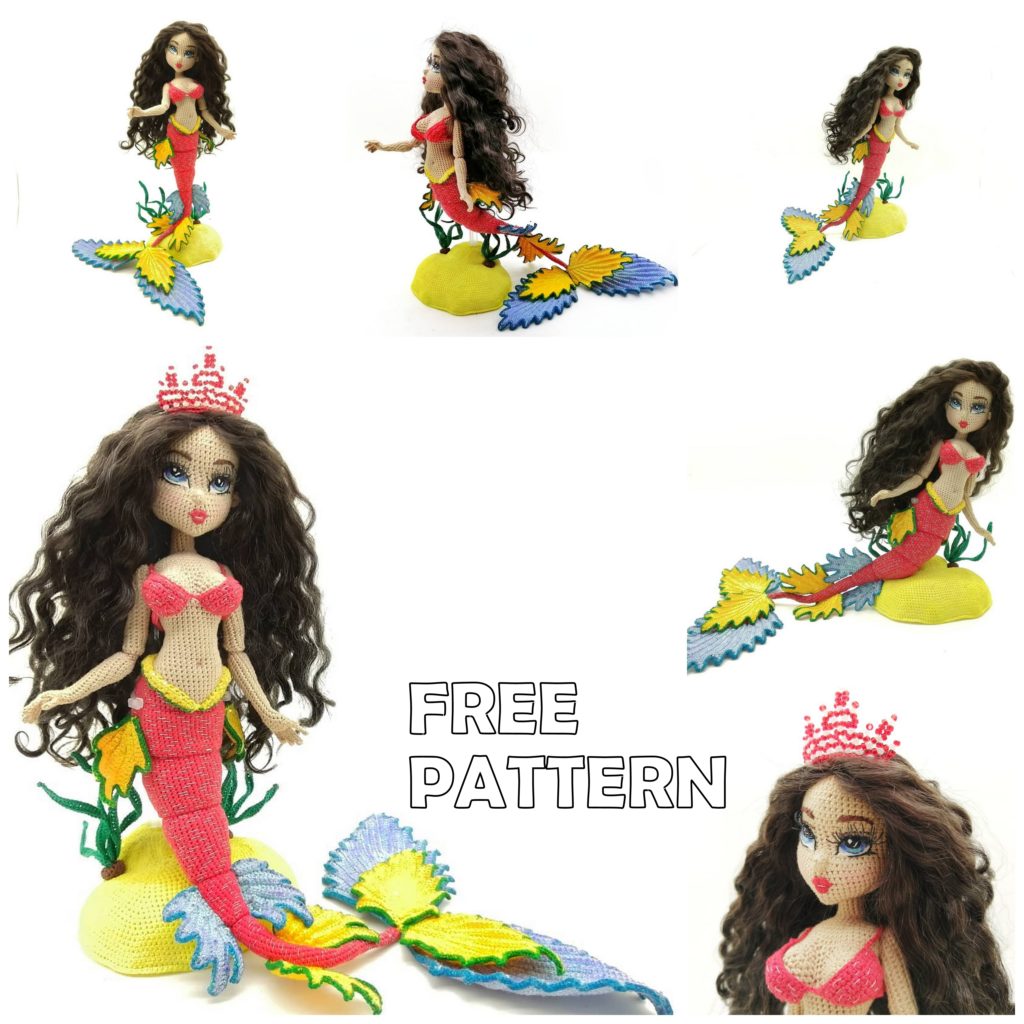
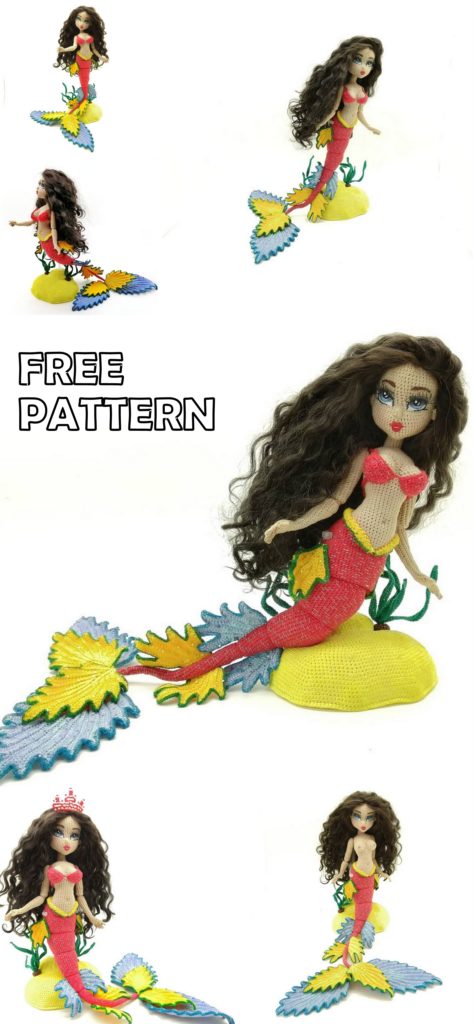
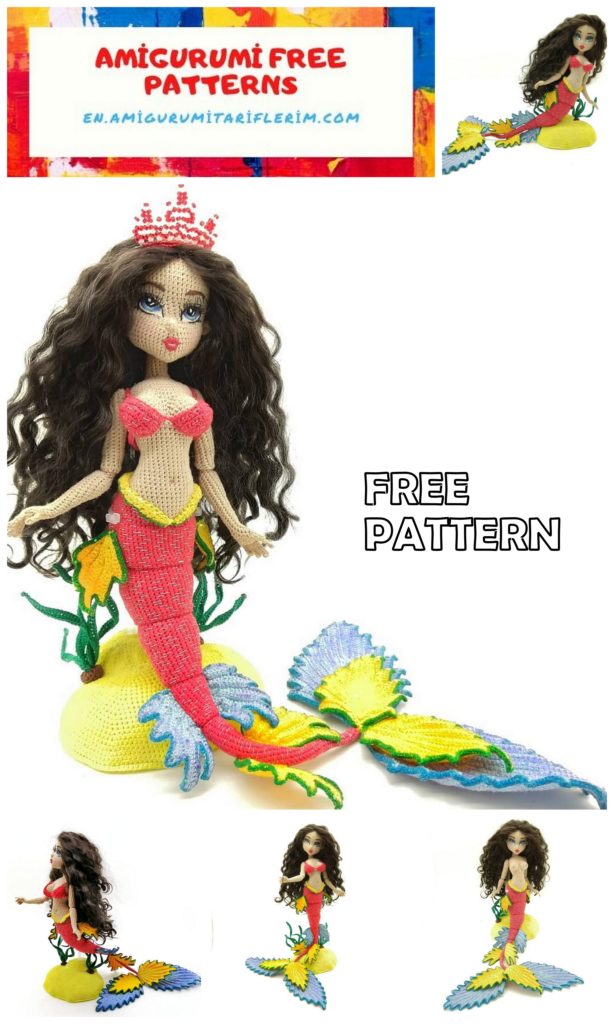
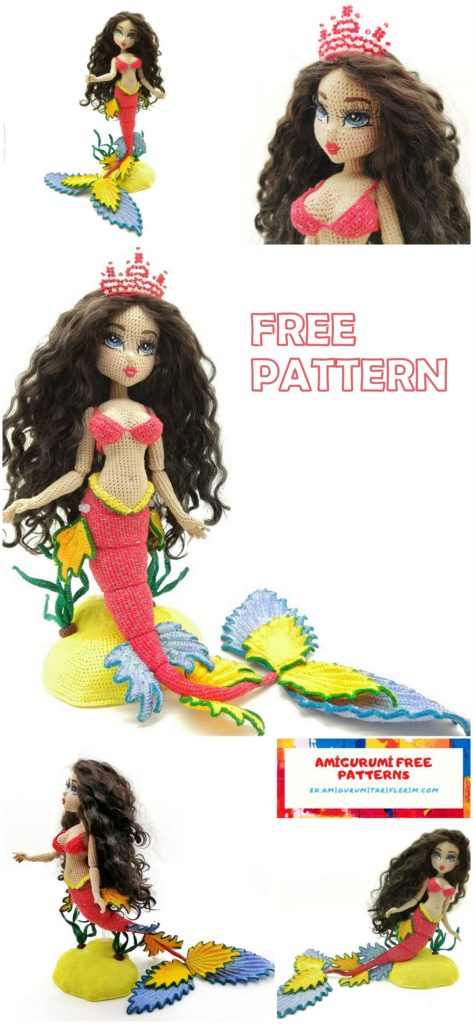
Amigurumi Princess Mermaid Free Pattern
Materials:
For crochet:
1)Yarn (3-4 colors: flesh, for the tail and bodice, 1 or 2 colors for fins).
In MK I will use yarn “Kirovsky iris” 300m / 50gr. When
using this yarn, the doll will be about 32cm in size without
lower fin. If you want a smaller size, you can use
yarn “Iris. Made in Italy “,” Lacemaker “or” Pekhorka. Colored
lace”. The yardage of this yarn is 450m / 50g. When using this
yarn, the pupa will be about 24 cm in size without the lower fin.
2)Hook 0.9mm and 0.75mm (for fingers) if you chose yarn
thicker. Hook 0.75mm and 0.5mm (for fingers) if you choose yarn
thinner.
3)Filling: synthetic fluff and holofiber.
4)Copper wire without braiding at 0.75mm – 1mm, I do not advise taking thicker wires, as it will be difficult to knit. You can buy it in an electrician’s store (single-core copper wire (PUV 1 * 0.75)).
5)Regular round button with 2 holes (button diameter 2cm).
6)Glue gun.
7) Elastic band. Half a meter. A hat elastic will not work !!!
The elastic that I use is called Elastic
decorative cord “” BLITZ “DT-02 3 mm”. I will attach a photo below.
You can also use an elastic band from a medical mask. One
elastic band on the tail, the other on the hands.
The main thing is that it is strong, stretches and there is no rubber inside the cord!
8) Beaded copper wire 0.2 -0.25mm for fingers (better silver, so it will be less noticeable).
9) Thick skewers and toothpicks for stuffing.
10) Round nose pliers.
11)A needle with a suitable yarn eye.
12)Scissors.
13)Adhesive plaster.
14)Long needle with a large elastic eye.
For embroidery, face, hair and toning:
1)Mouline thread (black, white, eye color (from 1 to 3 colors), color, dec, eyebrow color).
2)Fine beading needle.
3)Nail polish transparent or transparent PVA glue.
4)Hair dryer
5)Beige textile adhesive plaster. I am using Doctor layer “.
6)White sewing threads, if you dye, or the color of your hair
(2 coils 400m each or 3 coils 200m each).
7) Dry pastel, oil pastel. (Can be replaced with solid and soft colored pencils)
8) Acrylic paints. Can be substituted with food coloring for eggs).
9) Brush with a thin tip and a flat brush.
10) Self-disappearing fabric marker.
To decorate:
1)Metallized lurex thread.
2)Sequins.
3)Seconds glue.
You can use beads, sequins, beads. Here, where are you
will carry the fantasy)
ABBREVATİONS
Sc – single crochet
Ch – chain
Sl-st – slip-stitch
Inc – increase, knit 2 loops in one base
Inc3sc – increase 3sc, knit 3 loops on one base
Inc4sc – increase 4sc, knit 4 loops on one base
Dec – decrease, knit 2 stitches together
Dec3sc – decrease 3sc, knit 3 stitches together
Hdc – half double crochet
Dc – double crochet
D2c – double crochet (Column with 2 yarns)
Pico3 – 3ch, sl-st in fourth loop from hook
I still advise you to knit the doll with the wrong side out, so
how, firstly, it will be easier for you, especially in small details, and secondly,
the canvas will be smooth and beautiful, thirdly, the diagram is given for the wrong side.
BUT!!! If you have chosen for yourself that the doll will knit the front
side out:
1)Where the pattern says to knit for the front half-loops, knit for
back and vice versa;
2)Focus on my explanation of where should be located
decreases and increases.
I have prepared some introductory videos with techniques for you.
knitting that you will need in the process:
1)Front and back sides;
2)Decreases;
3)Marker;
4)Change of thread color;
5)Type-setting (I use instead of a chain of air loops);
6)Blindfin seam.
This video can be found in the Additional Videos folder.
Light loops for you!
PATTERN
Tail:
Before starting knitting, be sure to unwind from a skein of yarn
and cut 4-5 meters. We need this thread to tie the edge
parts in the knitting process!
Part 1:
We leave the thread from the beginning of knitting longer, we will
fix the wire inside the tail.
1)Magic ring 5sc;
We put a marker.
2-6)5sc;
7.4sc, inc (6);
8-12)6sc;
13.5sc, inc (7);
14-18) 7sc;
19.6sc, inc (8);
20-24)8sc;
25.7sc, inc (9);
26-30) 9sc;
31.8sc, inc (10);
32-34)10sc;
35.9sc, inc (11);
36-38) 11sc;
Watch video # 1.
We take a wire (about 18-20cm), bend it in half and
insert into the tail.
With a thread from the beginning of knitting the tail, we sew the wire inside, fixing it, we fix the thread and hide it inside.
We cut off one of the ends of the wire, bend it into a loop and
we tie the elastic band to this loop with the correct knot.
We fill the tail with synthetic fluff. We do not fill very tightly.
39.10sc, inc (12);
40-42)12sc;
43.11sc, inc (13);
44-46)13sc;
47.12sc, inc;
48-49) 14sc;
50.13sc, sl-st (14);
We cut the second part of the wire, bend it into a loop and hide
inside the ponytail.
We stuff.
51.2sc, dec, 5sc, dec, 3sc (12) – this row is knitted behind the front
half loops, decreasing from each side.
52.12sc;
53.2sc, dec, 4sc, dec, 2sc (10) – decrease from each side;
We fill the tail to the end.
54.5dec
Cut the thread, fasten it and hide the tip inside the tail.
!!! Caution. When you hide the thread, do not hook the elastic band !!!
The elastic will come out on top.
Part 2 (watch video # 2):
First, we knit 2 parts. Cut the thread on the first part, on
the second – no, we will continue knitting from her.
Details:
1)Magic ring 6sc – pull, but do not connect into a ring.
We connect:
1)(3sc, inc, 2sc) – for the first part, (2sc, inc, 3sc) – for the second
details (14);
Next, we knit 3 rows so that the front side is outside.
2-4)14sc;
+ 1sc offset
5)13sc, inc (15) – for the front half loop;
Unscrew the last row so that the remaining
half loops.
Attach additional thread and tie the edge sc,
capturing half-loops and loops of the 5th row. Make one increase in any
location.
Hide the threads.
We put a marker.
Next, knitting will be the wrong side out.
6.15sc;
7) 3sc, inc, 6sc, inc, 4sc (17) – by an increase from each side;
8.17sc;
9.16sc, inc (18) – increase in the back in the middle;
10.18sc;
11)4sc, inc, 8sc, inc, 4sc (20) – by an increase from each side;
12.20sc;
13.19sc, inc (21) – increase in the back in the middle;
14.21sc;
15)5sc, inc, 9sc, inc, 5sc (23) – by an increase from each side;
16.23sc;
17.22sc, inc (24) – increase in the back in the middle;
18.24sc
19.23sc, sl-st (24);
20) (2sc, dec) * 6 (18) –
this row is knitted for
front half loops;
21.18sc;
We stuff. Watch video # 3.
Insert the elastic into a needle with a large eye and pull through
the second part of the tail. Stretch elastic and fill with filler.
22)(sc, dec) * 6 (12);
Finish the part to the end.
23.6dec
Cut the thread, fasten it and hide it inside. Top hole
do not need to tighten!
Part 3:
First, we knit 2 parts. Cut the thread on the first part, on
the second – no, we will continue knitting from her.
We knit in rotary rows.
Details:
1)Magic ring 6sc – pull off, do not ring
unite;
2.ch, sc, inc, inc3sc, inc, sc (10);
3.ch, 9sc;
4.ch, 3sc, 2inc, 4sc (12);
We connect:
1.12sc for the first part, 12sc for the second part (24);
Next, we knit 1 row so that the front side is outside.
2.24sc; + 1sc offset
3.23sc, inc (25) – for the front half loop;
Unscrew the last row so that the remaining
half loops.
Attach additional thread and tie the edge sc,
capturing half and 3 rows. Make one increase in any
location.
Hide the threads.
We put a marker.
Next, knitting will be the wrong side out.
4.25sc;
5)6sc, inc, 11sc, inc, 6sc (27) – by an increase from each side;
6.27sc;
7.26sc, inc (28) – an increase in the back in the middle;
8.28sc;
9) 7sc, inc, 12sc, inc, 7sc (30) – by an increase from each side;
10.30sc;
11.29sc, inc (31) – increase in the back in the middle;
12.31sc;
13.7sc, inc, 14sc, inc, 8sc (33) – by an increase from each side;
14)32sc, inc (34) – an increase in the back in the middle;
15.34sc;
16)7sc, inc, 16sc, inc, 9sc (36) – by an increase from each side;
17.36sc;
18) 8sc, inc, 16sc, inc, 10sc (38) – by an increase from each side;
19.37sc, sl-st (38);
20.9sc, dec, 16sc, dec, 9sc (36) – this row is knitted behind the front
half loop, decreasing from each side;
21.2sc, dec, (4sc, dec) * 5, 2sc (30);
22.30sc;
23)(3sc, dec) * 6 (24);
We put on the 3rd part on the previous two. We stretch the elastic and stuff.
24)(2sc, dec) * 6 (18);
25.18sc;
26)(sc, dec) * 6 (12);
We finish the part to the end.
27.6dec (6).
Cut the thread, fasten it and hide it inside. Top hole
do not need to tighten!
Part 4:
First, we knit 2 parts. Cut the thread on the first part, on
the second – no, we will continue knitting from her.
We knit in rotary rows.
Details:
1)Magic ring 6sc – pull off, do not ring
unite;
2.ch, inc, (sc, inc) * 2 (9);
3.ch, 2sc, inc, inc3sc, inc, 3sc (13);
4.ch, 4sc, inc, inc3sc, inc, 5sc (17);
5.ch, 16sc (17);
6.ch, 4sc, inc, 5sc, inc, 5sc (19);
We connect:
1.19sc for the first part, 19sc for the second part (38);
Next, we knit 2 rows so that the front side is outside.
2-3.38sc;
+ 1sc offset
4.37sc, inc (39) – for the front half-loops;
Unscrew the last row so that the remaining
half loops.
Attach additional thread and tie the edge sc,
capturing half-loops and 4 rows. Do not make an increase anywhere need to.
Hide the threads.
We put a marker.
Next, knitting will be the wrong side out.
5.10sc, inc, 17sc, inc, 10sc (41) – by an increase from each side;
6.41sc;
7) 10sc, inc, 19sc, inc, 10sc (43) – for an increase from each side;
8.42sc, inc (44) – an increase in the back in the middle;
9.44sc;
10.43sc, inc (45) – an increase in the back in the middle;
11.45sc;
12.11sc, inc, 20sc, inc, 12sc (47) – by an increase from each side;
13 Author: Lesya Medvedeva (Instagram.com/medvedevadolls)
13.47sc;
14.46sc, inc (48) – increase in the back in the middle;
15.48sc;
16)11sc, inc, 21sc, inc, 14sc (50) – by an increase from each side;
17.49sc, sl-st (50);
18.11sc, dec, 21sc, dec, 14sc (48) – This row is knitted behind the front
half loop, decreasing from each side;
19) (6sc, dec) * 6 (42);
20) 42sc;
21)(5sc, dec) * 6 (36);
22)(4sc, dec) * 6 (30);
23.30sc;
We put on the 4th part on the previous three. We stretch the elastic and
stuffing.
24)(3sc, dec) * 6 (24);
25)(2sc, dec) * 6 (18);
26)(sc, dec) * 6 (12);
27.6dec
Cut the thread
pin and hide
inside. Top hole
do not need to tighten!
The inner part should not deform, so that in the future it is well fixed.
Part 5:
First we knit an oval:
1.Magic ring 6sc;
2)6inc (12);
3)(sc, inc) * 6 (18);
4.3sc, inc, inc3sc, inc, 6sc, inc, inc3sc, inc, 3sc (26);
5.6sc, inc, inc3sc, inc, 10sc, inc, inc3sc, inc, 4sc (34);
6.6sc, inc, 5sc, inc, 10sc, inc, 5sc, inc, 4sc (38);
7.10sc, inc, inc3sc, inc, 16sc, inc, inc3sc, inc, 6sc (46);
8.9sc, inc, 7sc, inc, 14sc, inc, 7sc, inc, 5sc (50);
9) (4sc, inc) * 10 (60).
We knit 2 details.
On the first part, the thread is cut, on the second – no, from it we will
continue knitting.
We knit in rotary rows.
Details:
1)Magic ring 6sc – pull together, do not connect into a ring;
2.ch, inc, (sc, inc) * 2 (9);
3.ch, 2sc, inc, inc3sc, inc, 3sc (13);
4.ch, 4sc, inc, inc3sc, inc, 5sc (17);
5.ch, 4sc, inc, 5sc, inc, 5sc (19);
6.ch, 18sc (19);
7.ch, 7sc, inc, inc3sc, inc, 8sc (23);
8.ch, 6sc, inc, 7sc, inc, 7sc (25);
9.ch, 24sc (25);
We connect:
1.25sc for the first part, 25sc for the second part (50);
Next, we knit 2 rows so that the front side is outside.
2-3)50sc;
+ 1sc offset
4.12sc, inc, 24sc, inc, 12sc (52) – knit a row for the front
half loops, the increments will be on the sides;
Unscrew the last row so that the remaining
half loops.
Attach additional thread and tie the edge sc,
capturing half-loops and 4 rows. There is no need to make an increase anywhere.
Hide the threads.
We put a marker.
Next, knitting will be the wrong side out.
5.52sc;
6)12sc, inc, 26sc, inc, 12sc (54) – by an increase from each side;
7.54sc;
8) 13sc, inc, 26sc, inc, 13sc (56) – by an increase from each side;
9.56sc;
10.13sc, inc, 28sc, inc, 13sc (58) – by an increase from each side;
11.58sc;
12.14sc, inc, 28sc, inc, 14sc (60) – by an increase from each side;
13.60sc;
14)Watch video # 4.
We connect the 5th part of the tail with the oval sc (behind the back half-loop of the oval and behind the back half-loop of the 5th part of the tail) – 60sc.
We do not cut or hide the thread, knitting will continue from it.
We embroider the tail (Watch video # 5).
Metallized thread
embroider the first 4 parts of the tail.
Assembling the tail (watch video # 6):
1)Pass the elastic through all parts of the tail and pull it.
We pass the elastic through the holes in the button, tighten and
fix the button. Cut the elastic and glue it on hot glue.
!!! When working, try not to lose tension in the elastic band !!!
We are waiting for the glue to completely dry and harden.
2)Completely fill the oval with hot glue.
!!! Be careful and careful so that the glue does not get on the loops, for which we will continue to knit !!!
We are waiting for the glue to completely dry and harden.
3)We take the wire (about 20-25cm, then the excess can be
cut off), remove the braid from the ends, leaving 2-2.5 cm in the middle, and bend it in half.
Bend the middle of the wire (which remained in the braid) at an angle
90 degrees, attach to the center (where the button is) and fill with hot glue from all sides.
Press and hold until the glue is completely cool and hard.
Fins:
All fins fit into the back half loop. Remember to leave long sewing threads at the beginning and end. The brackets indicate the number of loops that are not knitted to the end of the row.
Lower big (watch video # 7):
1.22ch, pico3, ch, skip one loop by air chain, 8dc, 4hdc, 8sc;
2)Ch, 19sc;
3.7ch, pico3, ch, skip one loop by air chain, 11dc,
4hdc, 8sc (2);
4)Ch, 22sc;
5.7ch, pico3, ch, skip one loop by air chain, 13dc, 4hdc, 8sc (3);
6.ch, 24sc;
7.7ch, pico3, ch, skip one loop by air chain, 15dc, 4hdc, 8sc (3);
8) ch, 26sc;
9.7ch, pico3, ch, skip one loop by air chain, 16dc,
4hdc, 8sc (4);
10) ch, 27sc;
11.7ch, pico3, ch, skip one loop through the chain,
16dc, 4hdc, 8sc (5);
12.ch, 27sc;
13.7ch, pico3, ch, skip one loop in the air chain,
17dc, 4hdc, 8sc (4);
14)ch, 28sc;
15.7ch, pico3, ch, skip one loop through the air chain, 20dc, 4hdc, 32sc;
16)ch, 50sc (5);
17.2ch, pico3, ch, skip one loop through the chain, 17dc, 4hdc, 8sc (22);
18.ch, 23sc (5);
19.2ch, pico3, ch, skip one loop through the chain, 16dc, 4hdc, 8sc (18);
20.ch, 22sc (5);
21.2ch, pico3, ch, skip one loop in the air chain, 16dc, 4hdc, 8sc (13);
22 ch, 22sc (5);
23.2ch, pico3, ch, skip one loop in the air chain, 15dc, 4hdc, 8sc (9);
24 ch, 21sc (5);
25.2ch, pico3, ch, skip one loop in the air chain,
13dc, 4hdc, 8sc (6);
26)ch, 19sc (5);
27.2ch, pico3, ch, skip one loop in the air chain,
11dc, 4hdc, 8sc (3);
28) ch, 17sc (5);
29.2ch, pico3, ch, skip one loop by air chain, 9dc, 4hdc, 8sc.
Work sl-st into first st of very first row.
Make ch and repeat rows 1-29.
Expand the fin and tie sl-st around the entire edge.
Bottom small:
1.12ch, pico3, ch, skip one loop by air chain, 4dc,
2hdc, 4sc;
2.ch, 9sc;
3.7ch, pico3, ch, skip one loop by air chain, 7dc,
2hdc, 4sc (2);
4.ch, 12sc;
5.7ch, pico3, ch, skip one loop by air chain, 10dc,
2hdc, 4sc (2);
6.ch, 15sc;
7.7ch, pico3, ch, skip one loop by air chain, 13dc,
2hdc, 4sc (2);
8) ch, 18sc;
9.7ch, pico3, ch, skip one loop by air chain, 16dc,
2hdc, 4sc (2);
10) ch, 21sc;
11.7ch, pico3, ch, skip one loop through the chain,
19dc, 2hdc, 15sc;
12.ch, 30sc (5);
13.2ch, pico3, ch, skip one loop through the chain,
16dc, 2hdc, 4sc (9);
14)ch, 16sc (5);
15.2ch, pico3, ch, skip one loop through the chain,
13dc, 2hdc, 4sc (7);
16)ch, 13sc (5);
17.2ch, pico3, ch, skip one loop through the chain,
10dc, 2hdc, 4sc (5);
18.ch, 10sc (5);
19.2ch, pico3, ch, skip one loop by air chain, 7dc,
2hdc, 4sc (3);
20.ch, 7sc (5);
21.2ch, pico3, ch, skip one loop in the air chain, 5dc, 2hdc, 4sc.
Knit sl-st in first st.
the very first row.
Do ch and repeat rows 1–21.
Expand the fin and tie sl-st around the entire edge.
Thigh fins (2pieces):
1.12ch, pico3, ch, skip one loop by air chain, 4dc,
2hdc, 4sc;
2.ch, 9sc;
3.7ch, pico3, ch, skip one loop by air chain, 6dc,
2hdc, 4sc (3);
4.ch, 11sc;
5.7ch, pico3, ch, skip one loop by air chain, 12dc, 2hdc, 7sc;
6.ch, 15sc (5);
7.2ch, pico3, ch, skip one loop by air chain, 6dc, 2hdc, 4sc (4);
8) ch, 6sc (5);
9.2ch, pico3, ch, skip one loop by air chain, 4dc, 2hdc, 5sc.
Work sl-st into first st of very first row.
Unfold the fin and tie sl-st around the entire edge.
Fin for the second part. Right (watch video # 8):
1.11ch, pico3, ch, skip one loop by air chain, 5dc, 2hdc, 2sc;
2.ch, 7sc (1);
3.7ch, pico3, ch, skip one loop by air chain, 7dc, 2hdc, 2sc (2);
4.ch, 9sc (1);
5.7ch, pico3, ch, skip one loop by air chain, 9dc, 2hdc, 2sc (2);
6.ch, 11sc (1);
7.7ch, pico3, ch, skip one loop over air chain, 11dc, 2hdc, 2sc (2);
8) ch, 5sc (9);
9.7ch, pico3, ch, skip one loop over air chain, 7dc, 2hdc, sc, inc3sc, (inc, sc)
* 3, sc.
Expand the fin and tie sl-st all over edge.
Fin for the second part. Left (watch video # 9):
1.13ch, pico3, ch, skip one loop by air chain, 7dc,
2hdc, 2sc;
2.3ch, 8sc (5);
3.9ch, pico3, ch, skip one loop by air chain, 11dc,
2hdc, 2sc;
4.3ch, 12sc (5);
5.3ch, pico3, ch, skip one loop by air chain, 9dc,
2hdc, 2sc;
6.3ch, 10sc (5);
7.3ch, pico3, ch, skip one loop over
air chain, 7dc, 2hdc, 2sc;
8.3ch, 8sc (5);
9.3ch, pico3, ch, skip one loop over
air chain, 5dc, 2hdc, 2sc, (inc, sc) * 4.
Expand the fin and tie sl-st all over edge.
Fin for the first part. Right:
1.14ch, pico3, ch, skip one loop along the air chain, 8cn,
2hdc, 2sc;
2.ch, 10sc (1);
3.7ch, pico3, ch, skip one loop by air chain, 10dc,
2pscn, 2sc (2);
4.ch, 12sc (1);
5.7ch, pico3, ch, skip one loop by air chain, 12dc,
2hdc, 2sc (2);
6.ch, 14sc (1);
7.7ch, pico3, ch, skip one loop over air chain, 14dc, 2hdc, 2sc (2);
8.ch, 8sc (9);
9.7ch, pico3, ch, skip one loop over air chain, 10dc, 2hdc, sc, inc3sc, (inc, sc)
* 3, sc.
Expand the fin and tie sl-st all over edge.
Fin for the first part. Left:
1.16ch, pico3, ch, skip one loop through the air chain, 10dc, 2hdc, 2sc;
2.3ch, 11sc (5);
3.9ch, pico3, ch, skip one loop on the air chain, 14dc, 2hdc, 2sc;
4.3ch, 15sc (5);
5.3ch, pico3, ch, skip one loop by air chain, 12dc, 2hdc, 2sc;
6.3ch, 13sc (5);
7.3ch, pico3, ch, skip one loop over air chain, 10dc, 2hdc, 2sc;
8.3ch, 11sc (5);
9.3ch, pico3, ch, skip one loop by air chain, 8dc, 2hdc, 2sc, (inc, sc) * 4.
Unfold the fin and tie sl-st around the entire edge.
Toning and painting (watch video # 10):
Before starting work, I advise you to tie 1-2 trial fins along
Fins to Hips pattern so you can experiment with
colors and choose the right combination.
First, toning the edges of the fins (toning on both sides).
I tint with oil pastels, you can also
use dry pastel or soft colored pencil.
Next, we dilute a small amount of acrylic paint on the fabric.
water, or we use food coloring (it should be diluted in much less water than indicated in the instructions).
With a flat brush, wringing out the water well, first paint over one side of the fin, let it dry completely, then paint the other side.
Breast (watch video # 11):
We leave the thread from the beginning of knitting long, we will make nipples for it. We knit the chest not very tightly.
1)Magic ring 5sc;
2.5inc (10);
3)(sc, inc) * 5 (15);
4)4sc, 7sl-st for front half loop, 4sc (15);
5.sc, inc, 2sc, (2sc, 3inc, 2sc) – we knit, grabbing the back half-loop of the connecting post and the remaining half-loop of 4 rows, 2sc, inc, sc (20);
6)6sc, 8sl-st for front half loop, 6sc (20);
7.6sc, (3sc, 2inc, 3sc) – we knit, grabbing the back half-loop of the connecting post and the remaining half-loop of the 6th row, 6sc (22).
Trim, leave the ends approximately 6cm.
Hands:
When knitting hands, we use 2 crochet hooks: 0.75mm for the fingers and 0.9mm for the hand itself.
For the frame, cut the wire
0.25mm 5pcs of 8-10cm and bend it in half.
Right hand (lower part):
Ladoshka (watch video # 12):
Fingers:
We knit the fingers sc for the front wall of the air loops.
1.6ch, insert the wire into the last ch, ch, 6sc from the second loop from the hook (6);
2)7ch, insert the wire into the last ch, ch, 7sc from the second loop from the hook (7);
3)6ch, insert the wire into the last ch, ch, 6sc from the second loop from the hook (6);
4)5ch, insert the wire into the last ch, ch, 5sc from the second loop from the hook (5).
Change the hook.
We put a marker.
1.sc – over the first finger, in the same loop where knitted
the last loop of the fourth toe, inc – over the second toe, sc – over
with the third finger, inc – over the fourth finger, unfold the palm:
sc – under the first finger, inc – under the second finger, sc – under the third finger,
find a loop in front of the marker and first knit sc for the front
the hinge wall and then sc behind the back hinge wall (12);
2)12sc;
3.7sc, (4ch, insert the wire into the last ch, ch, 4sc from the second
loops from the hook) – thumb, sc – in the same loop where knitted
seventh sc, 5sc (13);
4.7sc, skip a finger, sc, dec, 3sc (12);
5.6sc, 3dec (9);
6.9sc;
We hide the thread from the beginning of knitting.
We take a wire without braiding, about 12 cm, bend it in the middle into a ring and insert it into the palm of your hand. We wrap the wires from the fingers around the main wire.
7.6sc, dec, sc (8);
8-12)8sc;
Further, the increments will be located from the side of the thumb up diagonally in the opposite direction.
13.6sc, inc, sc (9);
14-15)9sc;
16)7sc, inc, sc (10);
We fill first the inner side of the hand, then the side parts.
We cut one of the wires so that the tip remains 1-1.5 cm, and bend it into a loop. We tie the elastic to this loop with the correct knot.
The second part of the wire should remain long.
17.10sc;
18.8sc, inc, sc (11);
19.11sc;
20.9sc, inc, sc (12);
We fill first the inner side of the hand, then the side ones. After that we stuff the outside of the hand a little.
21-24)12sc;
25.9sc, dec, sc;
The arrow shows the location of the increments.
We fill the hand starting from the inside of the hand, then we fill it in a circle.
26.11sc;
27.3sc, dec3sc, 2sc, dec3sc (7) – by dec3sc on the outside and inside of the hand;
We fill our hand to the end.
28-30) 7sc;
31)sc, 3dec (4).
We cut off the thread, fasten it and hide it inside the hand.
We cut the wire so that 1-1.5 cm remains on top, and bend this tip into a loop. The elastic remains long.
Left hand (lower part):
When knitting hands, we use 2 crochet hooks: 0.75mm for the fingers and 0.9mm for the hand itself.
For the frame, we cut the wire into 0.25mm 5pcs of 8-10cm and bend it in half.
Fingers:
We knit the fingers sc for the front wall of the air loops.
1.5ch, insert the wire into the last ch, ch, 5sc from the second loop from the hook (5);
2)6ch, insert the wire into the last ch, ch, 6sc from the second loop from the hook (6);
3)7ch, insert the wire into the last ch, ch, 7sc from the second loop from the hook (7);
4.6ch, insert the wire into the last ch, ch, 6sc from the second loop from the hook (6).
Change the hook.
We put a marker.
1.sc – over the first finger, in the same loop where the last 4 fingers were knitted, inc – over the second finger, sc – over the third finger, inc – over the fourth finger, unfold the palm: sc – under the first finger, inc – under the second finger, sc – under the third finger, find a loop in front of the marker and knit first sc for the front wall of the loop, and then sc for the back wall of the loop (12);
2)12sc, (4ch, insert the wire into the last ch, ch, 4sc from the second loop from the hook) – thumb, sc – into the same loop where the twelfth sc was knitted (13);
3)12sc, skip a finger, sc (13);
4.9sc, dec, 2sc (12);
5)5sc, 3dec, sc (9);
6.9sc;
We take a wire without braiding, about 12 cm, bend it in the middle into a ring and insert it into the palm of your hand. We wrap the wires from the fingers around the main wire.
7.6sc, dec, sc (8);
8-12)8sc.
Further, the increments will be located from the side of the thumb up diagonally in the opposite direction.
13.6sc, inc, sc (9);
14-15)9sc;
16.6sc, inc, 2sc (10);
We fill first the inner side of the hand, then the side ones.
We cut one of the wires so that the tip remains 1-1.5 cm, and bend it into a loop. We tie the elastic to this loop with the correct knot.
The second part of the wire should remain long.
17.10sc;
18.6sc, inc, 3sc (11);
19.11sc;
20) 7sc, inc, 3sc (12);
We fill first the inner side of the hand, then the side ones. After that we stuff the outside of the hand a little.
21-24)12sc;
25.7sc, dec, 3sc (11);
We fill the hand starting from the inside of the hand, then we fill it in a circle.
The arrow indicates the location of the increments.
26.11sc;
27.3sc, dec3sc, 2sc, dec3sc (7) – by dec3sc on the outside and inside of the hand;
We fill our hand to the end.
28-30) 7sc;
31)sc, 3dec (4).
We cut off the thread, fasten it and hide it inside the hand.
We cut the wire so that 1-1.5 cm remains on top, and bend this tip into a loop. The elastic remains long.
Upper arm (for left and right knits the same way):
First you need to unwind and cut off the yarn, about 20cm for each hand.
1.9ch, connect in sl-st ring in the first loop (9);
Next, knit in a spiral.
2-3)9sc;
4)8sc, inc (10) – this row is knitted for the front half loop;
5-14)10sc;
We bend the two bottom rows inward (along the remaining half loops).
Watch the video “Hand strapping”
Attach additional thread and tie at edge sc, grabbing the remaining half and 3 rows. Make one increase anywhere.
Hide the threads from the harness inside.
We push the elastic band from the first part through the second part, pull and stuff.
15-21)10sc;
We fill the detail.
22)sc, ch, bend the elastic outward, skip one loop along the arm, from the second – 8sc (10);
23)sc, sc in a chain loop, 8sc (10);
24.5sc, dec, 3sc (9) – dec on the opposite side of the elastic;
We fill the part to the end.
25 sc, 4dec (5).
Through a small hole with a toothpick we finish off the top so that the top of the hand is round.
We cut the thread, fasten it and hide it inside.
Hinges:
1)Cast on 10 loops around the elastic, connect sl-st to the first loop (10)
– watch video # 13;
2)(sc, inc) * 5 (15);
3.15sc;
4)(sc, dec) * (10);
5.4dec (6) – incomplete row.
Cut and hide the thread, you do not need to tighten the ring (when we insert our hands into the body through this hole, we will fill it). Hide the thread from the beginning of knitting.
Body:
Unwind the flesh-colored yarn (20cm) and cut. It will be needed to tighten the navel. First, we need to move the beginning of the row. For this we knit 23sc offsets. The row will now start from this place.
We put a marker.
Next, we will knit with a color change. An underlined number will represent a different color (example: 5sc, 3sc, 5sc).
The threads from the color change should be relaxed inside. !!! You don’t need to tie them !!!
1)7sc, 3sc, 12sc, dec, 27sc, dec, 7sc (58) – decrease from each side, flesh-colored 3sc should be in the front center;
If three flesh-colored loops are not in the center, then you need to change the number of offset loops, which you did at the beginning, that is, instead of 23sc, knit 1-2 loops less or more, and then knit according to the pattern.
2.6sc, 5sc, 47sc (58);
3.5sc, 7sc, 10sc, dec, 26sc, dec, 6sc (56) – decrease from each side;
4)4sc, 9sc, 9sc, dec, 24sc, dec, 6sc (54) – decrease from each side;
5.2sc, 13sc, 39sc (54);
6.17sc, 5sc, dec, 22sc, dec, 5sc, sc (52) – decrease from each side;
7.18sc, 5sc, dec, (2sc, dec) * 5, 5sc, 2sc (46) – all the decreases will be behind, we reduce the butt;
8.19sc, 4sc, dec, 14sc, dec, 2sc, 3sc (44) – decrease from each side;
9.20sc, sc, (sc, dec) * 3, (dec, sc) * 3, sc, 4sc (38) – all the decreases will be behind, reduce the butt;
10.21sc, 12sc, 5sc (38);
11.21sc, 6dec, 5sc (32);
Next, we completely switch to flesh color.
12.32sc;
We stuff.
The whole body must be stuffed tightly.
First we fill the back, then the side ones. Lastly, we fill in the front.
13.32sc;
14.23sc, dec3sc, 6sc (30) – back-center decrease;
15.30sc;
16)22sc, dec3sc, 5sc (28) – backward decrease in the center;
17.28sc;
We stuff.
First we fill the side parts, then the front. You don’t have to stuff it from the back.
Note that the marker will move back towards the back, as it should.
18.28sc;
19) 2sc, inc, 12sc, inc, 12sc (30) – by an increase from each side.
20.30sc;
21)3sc, inc, 12sc, inc, 13sc (32) – by an increase from each side, but they will not be located strictly on the sides, but slightly displaced to the front of the body;
22.26sc, inc, 5sc (33) – center back increase;
23.4sc, inc, 12sc, inc, 15sc (35) – in increments from each side, but they will not be located strictly on the sides, but slightly displaced to the front of the body;
We fill first the side parts of the body, then the front and a little back.
Next we will knit the chest (watch video # 14).
24)5sc, 6sc together with the chest, 3sc along the body, 6sc together with the chest, 7sc, inc, 4sc, inc, 2sc (37) – back increases, on the chest we knit the first three and the last three loops of the last row;
25.4sc, sc across the chest, skip 1 loop over the body, 6sc over the body, sc over the chest, skip 1 loop over the body, sc over the body, sc over the chest, skip 1 loop over the body, 6sc over the body, 1sc over the chest, Skip 1 loop over the body, 16sc (37);
The strings from the end of the knitting of the chest can be cut and hidden inside the body.
26.4sc, sc across the chest, skip 1 loop over the body, 6sc over the body, sc over the chest, skip 1 loop over the body, sc over the body, sc over the chest, skip 1 loop over the body, 6sc over the body, 1sc over the chest, Skip 1 loop over the body, 10sc, inc, 5sc (38) – increase from behind in the center;
27.3sc, inc, sc across the chest, skip 1 loop over the body, 6sc over the body, sc over the chest, skip 1 loop over the body, sc over the body, sc over the chest, skip 1 loop over the body, 6sc over the body, 1sc over chest, skip 1 loop over the body, inc, 16sc (40) – for an increase from each side;
28-29) 5sc, sc across the chest, skip 1 loop over the body, 6sc over the body, sc over the chest, skip 1 loop over the body, sc over the body, sc over the chest, skip 1 loop over the body, 6sc over the body, 1sc over the chest, 1 loop skip over the body, 18sc (40);
We fill the chest tightly so that it is beautifully shaped.
30.6sc, 6sc on the chest, skip 6 loops on the body, from 7 – 3sc, 6sc on the chest, skip 6 loops on the body, from 7 – 19sc (40);
+34 sc mid-back offset.
We fill the side parts first, then the front part. In the last place, we fill the back.
Making nipples.
We insert the needle into the place where the nipple will be and take it out, leaving a small loop.
We make 3-4 yarns on a needle and pull the thread to the body.
We insert the needle next to the nipple and bring it inside the body. Repeat with the other breast. We tie the threads together and cut them.
We put a marker.
31.7sc, inc4sc * 3 – for the front half loop, 20sc, inc4sc * 3 – for the front half loop, 7sc (58);
Further, in order not to lose the loops we need, we will put an additional marker.
32.7sc, (inc, 3sc) * 2, inc, 2sc, put an additional marker, 21sc, (3sc, inc) * 2, 3sc, sc, put an additional marker and knit sc in the same loop, 7sc (64);
33.8sc, 4ch, 13 loops over the body skip, from 14 loops (loop after the marker) – 22sc, 4ch, 13 loops over the body, we skip from 14 loops (loop after the marker) – 8sc (46);
34.7sc, 3dec, 20sc, 3dec, 7sc (40);
At this stage, until we have attached the handles, it will be convenient to embroider the rest of the tail, and also tie and sew on the fin that separates the tail from the body.
Fin:
1)Dial 38 loops (Watch the video “Dialing row”).
2.ch, sc in the third loop from the hook, ch, sc, 2ch, sc, 3ch, sc, 2ch,
sc, (ch, sc, 2ch, sc) * 13, 2ch, sc, 3ch, sc, 2ch, sc, ch, sc, sc, sl-st.
We paint the edges of the fin and sew. (Watch the video “Blindfin seam”).
Next, we make a tightening on the navel.
We introduce the needle in the front, where the navel will be (approximately 12th row of the body) and draw it out from behind under the fin. We remove the needle from this end of the thread and put it on the end that is in front of the body. We again insert the needle in front, but already in the adjacent loop of the navel, and withdraw it from behind under the fin.
We introduce the needle into the adjacent loop, we withdraw it on the navel. We again insert into the adjacent loop of the navel and bring it out from behind. We tighten the threads, fix them and hide them inside the body.
We insert hands. We insert the elastic into the hole, push the hook into it, hook the hinge and push it inside.
It is best to use a different hook (not the one you are knitting with) so that the main hook does not accidentally bend in the process.
We stuff the hinges tightly.
We stretch the gum and fill it with a drop of hot glue.
We are waiting for the glue to harden (we keep it taut all this time), and cut it off.
If you do not want or are afraid to use glue at this point, then the ends of the elastic bands can be knotted, but not now, but in rows after 2-3, when the torso is full. Otherwise, you will tighten the body and prevent it from fully expanding when stuffing.
Wrap about 3cm thicker adhesive tape around the neck.
We do not cut the ends of the wire yet, since it will have to go approximately to the middle of the head.
35.5sc, 4dec, 14sc, 4dec, 5sc (32) – decreases are located on the shoulders;
We stuff the body. First, we work well on the upper part of the chest (namely the chest, and not completely the entire front). After that we stuff the side seats under the hinges well, then we stuff the front part. In the last place, we fill the back.
36.5sc, 3dec, 10sc, 3dec, 5sc (26) – decreases are located on the shoulders;
37) 4sc, 3dec, 6sc, 3dec, 4sc (20) – decreases are located on the shoulders, but go slightly to the front of the body;
First, we stuff our shoulders over the hinges to spread them to the sides and raise them a little. After we fill the front of the body and last of all the back.
38.4sc, dec, 8sc, dec, 4sc (18) – decrease from each side;
39.8sc, dec3sc, 7sc (16) – triple decrease in the front center;
We fill the shoulders first, then the front and last of all the back.
40.4sc, dec, 5sc, dec, 3sc (14) – decrease from each side;
41-46)14sc;
If there is not enough adhesive plaster on the neck, then we finish it off a little.
47.dec, 12sc (13) – backward decrease;
48.dec, 11sc (12) – backward decrease;
If you have an adhesive plaster on top, then you need to carefully cut it off.
49-51)12sc;
52.6dec
The last 6 rows do not need to be filled.
We tighten the upper ring, fix and hide the thread.
We cut one of the wires at the end of the neck, the other should
stay (about 1.5-2cm). It will go into the head so that it bends.
At this stage, we sew the side fins on the thighs and the fins on the 1 and 2 lower parts of the tail.
Correctly position the spinning parts of the tail so that the increments are in the back, as well as the fins themselves (on the right lower fins there is a thread on top, on the left – below).
Sew the fins first from the front side, and then from the wrong side.
Do not sew on the large fin yet, it will get in the way!
Bodice:
We knit 2 parts in rotary rows. We cut off the thread of the first, not the second. For the fastener, I use this hook. At the Detail, I cut off this part so that it is smaller. I pinch the rings and connect them together.
1)Magic ring 6sc – pull together, do not connect into a ring;
2.ch, inc, (sc, inc) * 2 (9);
3.ch, sc, inc, (2sc, inc) * 2 (12);
4.ch, 2sc, inc, (3sc, inc) * 2 (15);
5.ch, 3sc, inc (4sc, inc) * 2 (18);
6-7) ch, 17sc (18);
8.ch, 4sc, dec, 4sc, dec, 5sc (16);
9.ch, 3sc, dec, 4sc, dec, 4sc (14).
After 2 pieces, make 2ch and connect with the first sl-st.
Hide the threads. Embroider the bodice.
Clasps:
Magic ring 7sc – pull off and cast on 5-6 loops according to the “Typesetting row” scheme.
Connect with sl-st bodice. Do the same part on the other side.
Hide the threads and sew on the hook.
Attach string to top of bodice and dial 22-24 ch.
Pin back with a needle and sew.
Hide the threads.
Head:
The first 6 rows are knit right side out. This will be the inner part that wraps around the neck.
1)Magic ring 7sc;
2)sc, 6inc (13);
3-6)13sc;
7.3sc, (sc, inc, sc, inc3sc, sc, inc, sc) – for the front half loop, 3sc (17);
8) 5sc, inc, 3sc, (3ch, 2sc from the second loop from the hook), 3sc (starting from the loop where the air loops come out), inc, 5sc (25);
9.4sc, inc, 6sc, inc3sc * 3, 6sc, inc, 4sc (33);
10.6sc, inc, 3sc, inc, 4sc, inc, inc, 3sc, inc, 4sc, inc, 3sc, inc, 6sc (41);
11.20sc, inc3sc, 20sc (43);
12)12sc, inc, 6sc, 3dec, 6sc, inc, 10sc, inc (43) – 3dec should be in the center, this is the chin;
13.2sc, inc, 38sc, inc, sc (45);
14.13sc, inc, 17sc, inc, 13sc (47);
15.3sc, inc, 40sc, inc, 2sc (49);
16.14sc, inc, 19sc, inc, 14sc (51);
17) 4sc, inc, 20sc, dec, 20sc, inc, 3sc (52) – Dec and the loop in front of it should be in the center, if they are displaced, then make 1-2 displacement loops before the beginning of the row;
18.16sc, inc, 8sc, ((hdc, dc, d2c) – one loop behind the front half loop, (d2c, dc, hdc) – one loop behind the front half loop) – this is nose, 8sc, inc, 16sc (58 );
19.26sc, 3dec, 26sc (55) – dec go along the nose;
20.19sc, dec, sc, dec, 2sc, dec3sc, 2sc, dec, sc, dec, 19sc (49) – two reductions for the eye sockets and dec3sc for the nose;
21.19sc, dec, 2sc, dec3sc, 2sc, dec, 19sc (45) – for the decrease in the eye sockets and dec3sc for the nose;
22-25)45sc;
26.18sc, 3inc, 3sc, 3inc, 18sc (51) – 3sc should be in the center and inc on the sides of them;
27.51sc;
28.49sc, dec (50);
29.4sc, dec, 39sc, dec, 3sc (48);
30-32)48sc;
We stuff our head in order to straighten the side parts and stuff well the place where the eyes will be located.
Eye embroidery (watch video # 15):
We draw the eyes with a self-disappearing marker on the fabric:
1)Inner corners of the eyes – 21 rows, between them 3 loops
2)Top of eyes – middle of the 25th row
3)Bottom of the eyes – 20 row
4)Outer corners of the eyes 23 row
The width of the eyes is about 5-5.5 loops. Draw the pupils.
After drawing the eyes, and the shape suits you completely, we take out the filler (I no longer use it for stuffing, I just throw it away).
We embroider the face with a thin beaded needle and floss in one thread.
We use a separate thread for each eye, and do not transfer it from one eye to another, since after filling all these threads can shine through between the eyes, and we will also avoid chafing the thread.
First we embroider the upper contour of the eye.
We withdraw the thread in the inner corner of the eye and sew with small sparse stitches to the outer corner. We make a small stitch in the corner of the eye to secure the thread in this place. Next, introducing the needle from top to bottom under each stitch, we go back. We bring the thread inside the head, fix and cut.
All embroidery will be built on this principle.
We embroider the pupils. We draw the thread close to the upper contour and sew a circle with rare stitches, then inserting the needle from the outside to the inside we sew under each stitch. When the pupil contour is ready, insert the needle under one edge of the contour and draw it under the other, and thus fill the pupil in different directions.
We embroider the iris of the eye. I use three colors: close to the pupil light, then darker and then even darker.
We drive the needle close to the pupil and sew with rare stitches close to the contour of the pupil. If you can’t make a stitch on the top of the knitted fabric, then just bring the needle inside the head and return it to the outside. Next, sew under each stitch in the opposite direction, inserting a needle from the pupil. In the next row we sew with stitches close to the first row, and then, introducing a needle from the pupil, we sew, dividing the thread of the previous row and under the stitch of the last row.
So we sew another 3-4 rows.
Embroider the iris outline.
We drive the needle close to the iris and sew with rare stitches close to its contour. Next, sew under each stitch in the opposite direction, inserting a needle from the pupil.
We embroider the white of the eye.
We drive the needle close to the iris and sew with rare stitches close to its contour. Next, sew under each stitch in the opposite direction, inserting a needle from the pupil. In the next row we sew with stitches close to the first row, and then, introducing a needle from the pupil, we sew, dividing the thread of the previous row and under the stitch of the last row.
So we sew another row.
We sew the inner corner of the eye with stitches close to each other, inserting and withdrawing the needle into the head.
We embroider the highlights on the eyes.
Finally, we embroider the lower contour and the lower cilia.
We drive the needle close to the white of the eye and make 3-4 long stitches.
We withdraw the needle inside the head, and then we withdraw it near the penultimate stitch. Sew under each stitch by inserting a needle from the pupil.
We bring the needle inside the head and put it in the place where the cilia will be. We embroider them.
We attach the threads for the cilia.
We introduce a needle and thread under the upper eye contour, leaving the tip 3-4 cm. We again insert from below into the same place and drag the needle into the formed loop. Cut the thread, also leaving 3-4cm.
Thus, we fix it 4-5 more times.
Leave the threads so long, since the ends of the threads will fringe during the knitting process.
Next, with twisting movements, we put the head on the neck and stuff it in this position.
The lower part of the head (row 26 each) should be stuffed very tightly. First of all, we fill the chin, then we go to the right and left of it. We fill the lower part of the head and cheeks well. Working on the side of the head. Then we work on the back of the head.
Places marked with arrows should be given special attention.
We continue to knit.
33.3sc, dec, (6sc, dec) * 5, 3sc (42);
34.42sc;
35)(5sc, dec) * 6 (36);
36.36sc;
37.2sc, dec, (4sc, dec) * 5, 2sc (30);
38) (3sc, dec) * 6 (24);
We stuff our head to the top. If the lower part of the head was packed tightly, then the forehead and back of the head should be slightly protruded with a finger.
First, we fill the forehead, straightening it forward. Then we stuff the side parts of the head, and last of all the back of the head.
We won’t stuff our heads anymore.
39) (2sc, dec) * 6 (18);
40) (sc, dec) * 6 (12) – finish on this row, if you will make hair from tress;
41.6dec – we end on this row if you make hair from sewing thread or yarn.
I do not tighten the upper ring, I just fasten the thread and hide it inside the head.
Embroidery rdec and eyebrows (watch video # 16):
We draw sponges with a self-disappearing marker.
We introduce the needle through the chin into the center, between the upper and lower lips. Sew the contour of the upper lip with rare stitches.
Introducing the needle from the outside to the inside of the upper lip, sew under each stitch. When the outline is made, in the middle of where to make a small stitch and tighten it (so that there is a clear cut). Next, we insert the needle at an angle at the bottom edge and bring it out over the top edge, and thus embroider the lips from the center, first in one direction, then in the other. If you need to make the sponges bigger, then we repeat. We bring the thread to the chin, cut it off and hide it.
We embroider a smile. We introduce the needle a little to the right of the center and bring it to the chin. Remove the needle from this end of the thread and put it on the other end. We make 2-3 stitches in white. We bring the thread to the chin, cut it off and hide it.
We embroider the lower lip. Through the chin we bring the needle to the center under the white color and embroider the outline of the lower lip with small stitches. Introducing the needle from the outside to the inside of the lower lip, sew under each stitch.
Fill in the lower lip by inserting the needle over the top edge and pulling out under the bottom edge.
We try not to catch the white embroidery. If you need to make the sponges bigger, then we repeat.
We bring the thread to the chin, cut it off and hide it.
We emphasize the upper lip. We introduce the needle in the center above the white color and bring it to the chin. Remove the needle from this end of the thread and put it on the other end. We introduce the needle just above the right corner of the mouth and draw it out just above the left corner of the mouth.
We pull up the thread. Insert the needle in the center over white. We bring the thread to the chin, cut it off and hide it.
We embroider the eyelid. We withdraw the needle above the eye, sew with sparse stitches and in the opposite direction, introducing the needle from the forehead to the eye, sew under each stitch.
We embroider eyebrows.
1)We withdraw the needle to the place where the eyebrow will begin, and we introduce it in the same row through 6-7 loops. We withdraw the needle in the center of the eyebrow, but a row higher under the thread.
2)We introduce the needle into the same place, but above the thread and bring it out to the place where we started.
3)Repeat points 1-2.
4)We introduce the needle to the center and bring it to the place where we started.
5)Sewing a needle under the eyebrow and drawing over it (or vice versa), we embroider.
Ears:
Magic ring 6sc – pull together, do not connect into a ring.
Sew on the ears. Lower edge of the ear – 17-18 rows.
Retreat 12-13 loops from the nose.
Swivel head:
We insert the thread in two additions into the neck. We insert all four threads into a long needle and bring them out to the top of the head.
Separate 2 threads and draw them into the adjacent loop. We tie and hide inside the head.
Hair coloring and fastening. Sewing threads (watch video # 17):
Cut white sewing threads of the required length (2 spools of 400m) and fold in half.
We dilute acrylic paint in two glasses and immerse the ends of the threads there. We are waiting for half an hour until the paint is absorbed.
We take out the dyed threads and put them on a towel until they are completely dry. Do not forget to turn them over, otherwise they will be darker on one side.
Dries up the threads will not be as bright. The painting can be repeated if desired.
We outline the line of hair growth.
In the places marked with the number 1, we attach 4 threads in one strand.
In the places marked with the number 2, we attach 2-3 threads in one strand.
In the places marked with the number 3, we fasten the hair according to the principle of attaching a fringe.
Before attaching the threads, we wrap the body and face of the doll in film so that it does not get dirty.
Hair attachment. Tress:
We outline the hairline. We attach the tresses along the hairline with needles to the head and sew.
So we make 2 more circles so that the wefts in the upper part reach the hole on the head. We fasten the tresses close to each other.
After attaching each row, comb the hair and secure it under an elastic band so that it does not interfere.
For the back of the head, cut several pieces to the width of the head and sew them on top of each other until we reach the hole on the top of the head.
We fold the tress, sew the base and glue it into the remaining hole on the head.
! Be sure to remove the film from the doll before steaming hair!
We straighten the hair on top of the head, put gauze on top of the head and steam it off. Let it dry.
We collect the hair from the face into a ponytail and steam it again, but not from above, but from the side of the face.
Since, in the process of combing, the curls were frayed, I moistened my hair with water and let it dry.
Cilia (Watch video # 18):
We glue the adhesive plaster over
eyes so as not to stain the doll. I AM
I use a bactericidal adhesive plaster on
fabric base. Before you stick it,
you need to glue it 1-2 times and tear it off
fabric to remove excess glue from it.
We dilute PVA glue with water 1: 1.
We put a skewer under the eyelash, coat with diluted
glue and dry with a hair dryer.
We do this with each eyelash.
When the cilia are completely dry, cut them to the desired length and twist them a little on a toothpick. We remove the adhesive plaster.
Eyes and body tinting (Watch video # 19).
Sew on the big and small bottom dancers! We decorate the tail and bodice as desired!
If you have any difficulties, I will always be happy to help and answer your questions!

